Photo management without databases
∙ 8 min ∙ Deutsch
This blog post shares the experience of organizing my photos. It’s one of those things I was dreading but I’m very happy with the result. There were a few things I wanted to get right in my setup.
- Portability - The entire setup below avoids platform lock-in as much as possible
- Flexibility - I want my photos to work for me, not the other way around. I want the freedom to organize my photos as I see fit today and change that easily in the future if need be
- Automation - As much of the setup should be automated or semi-automated as possible. The point of the exercise is to enjoy your photos, not to create a new chore
Of course, this won’t be the right setup for everyone and I may have missed something. Feel free to leave comments below.
Disclaimer: I have mostly Apple devices and therefore the tool and workflow selection below reflects that. If you use a Windows machine, you’ll have to do some research to find similar tools that work for you.
Storage
Make sure you choose a rock-solid storage solution. I chose Dropbox due to my positive experience storing all my other documents. But remember, this setup is platform independent, so it should work on Google Drive, OneDrive, Box, Network Attached Storage (NAS) or whatever other storage solution you choose. It should also work if you decide to change storage for whatever reason, like Dropbox raising its prices.
Update: Since I published this article, I moved from Dropbox to Sync.com and then from Sync.com to a Network Attached Storage (NAS) solution. I just dragged and dropped my documents each time with no annoying export/import flows.
Continuous upload
Any decent cloud storage service (including NAS setups) offer the ability on all your devices to automatically upload new photos to a Camera Uploads folder. I’ve enabled this across my devices. The Camera Uploads folder is where all my new photos land, no matter how I create or receive them (eg. even via chat apps like WhatsApp). I drag and drop photos from Camera Uploads into the appropriate year folder and event subfolder whenever I’m in a photo-organizing mood. Most respectable cloud storage systems will offer automatic upload, and I’d avoid any that don’t.
This also avoids your phone holding your recent photos without any backup of them, in case you drop your phone in the river, your photos will be safe.
Organizing your files
Many photo organization apps (like Apple’s Photos) use the concept of Albums. In principle, this is a great concept but remember that it organizes your photos based on metadata about the photo external to the file itself. There’s nothing in the file itself that would tell any other photo app that photo1.jpg is part of the “Vacation 2019” album. That means that a migration away from Apple Photos could mean a loss of all that photo-to-album association. I really wanted to avoid this lock-in.
This led me to decide to organize my photos into date-based groupings using simple folders. To avoid one huge folder of photos, I group into years, and then where appropriate, into events. Here’s an example:
2017 📁
│   ...
│   2017-11-19 20.37.30.jpg 🏞
│   2017-11-19 20.49.59.jpg 🏞
│   2017-11-19 20.37.30.jpg 🏞
└───2017-12 Christmas 📁
|   │   2017-12-25 15.44.51.jpg 🏞
│   │   2017-12-25 15.44.55.jpg 🏞
│   │   2017-12-25 15.44.56.jpg 🏞
│   2017-12-28 13.14.59.jpg 🏞
|   ...
The other years look similar. This setup offers the flexibility of grouping photos where necessary and avoiding it when unnecessary.
File naming
Your photo filenames will often be meaningless (eg. IMG49003.jpg). Sequential naming makes sorting the files in your directories a nightmare because photos from different sources may be named in different ways. Here’s where I normalize that.
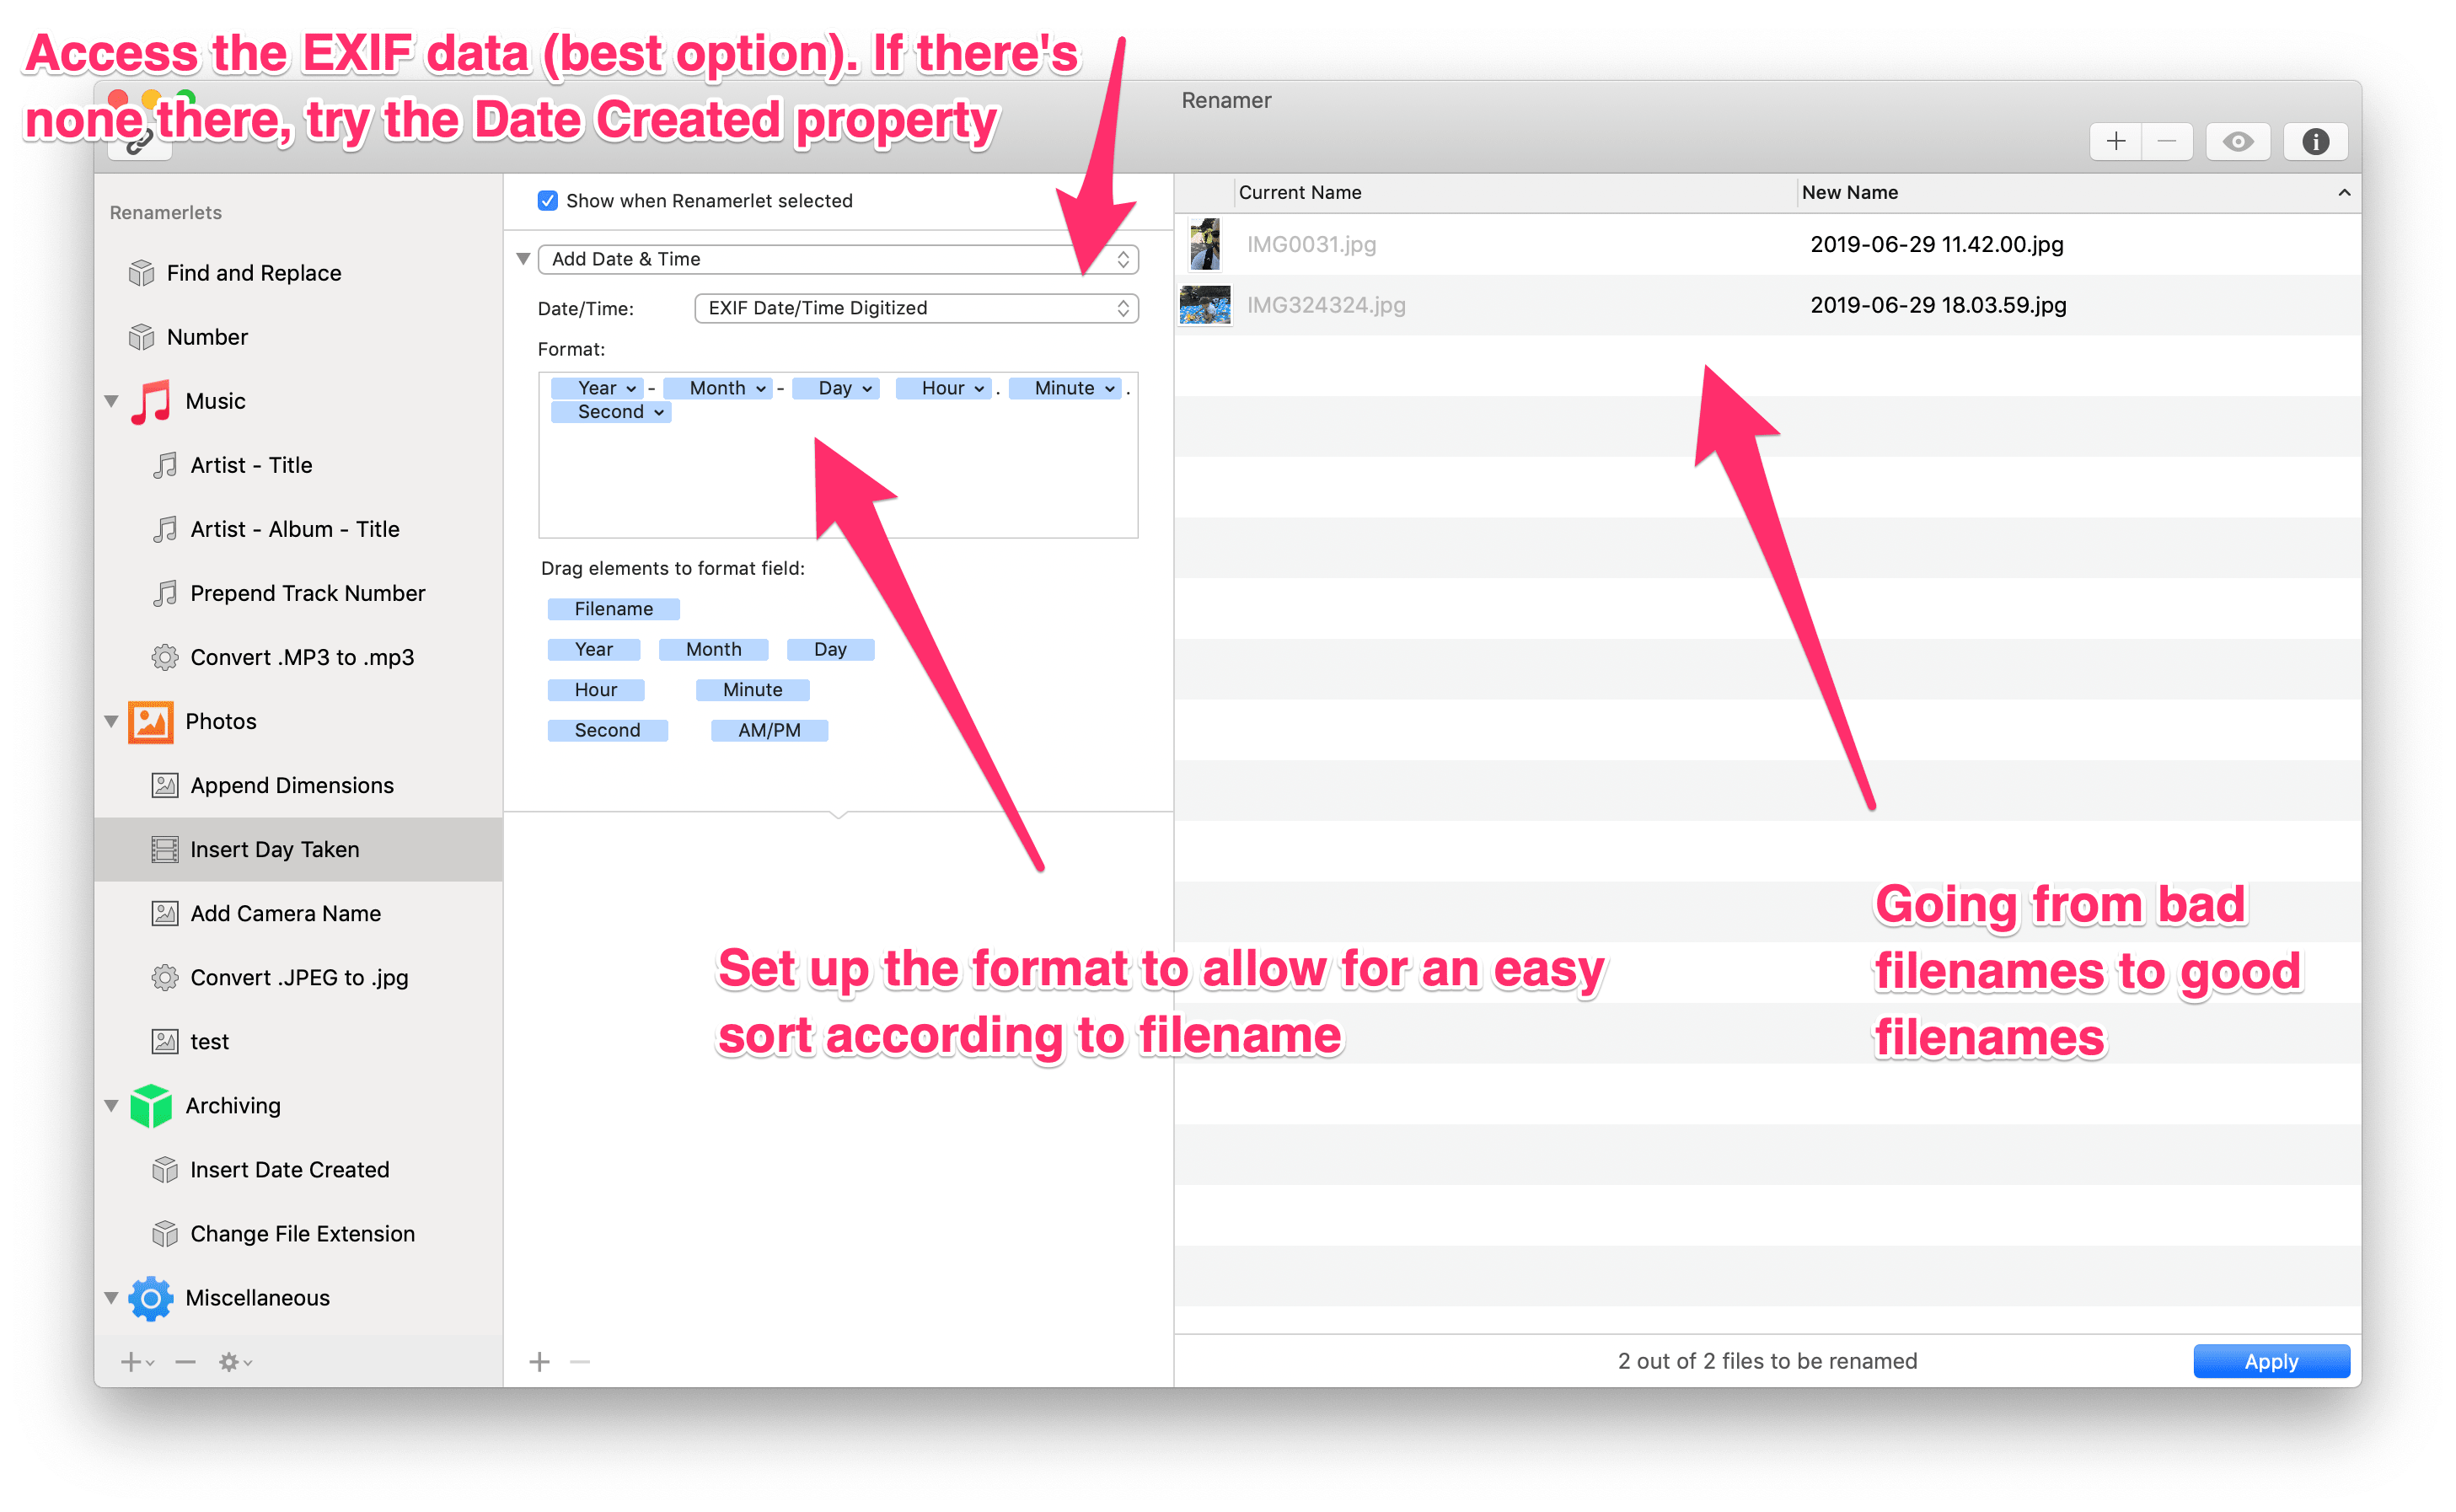
I recommend Renamer for macOS. You can drag an entire directory’s files into the edit window and batch rename them to the images’ true creation date (as stored in the Exif metadata). Exif metadata is great data about the device used to create the photo or movie that’s embedded right into the file (eg. creation date, location, camera type, etc…). Exif metadata (and other metadata) is great for organization because it has no dependencies on the photo app or storage you’re using. It’s intrinsic to the file itself. This point will be important when I address Albums and Tags.
Notes
- Renamer for Mac is a paid app. My opinion: it’s money well spent
- If two photos are taken in the same second, they would present the problem of duplicate naming. Renamer automatically appends a number (eg. “-1”, “-2” and so on) to the filenames as necessary
- Some files may not have Exif data. In that case, try the Date Created or Date Digitized properties. If those don’t work, revert to naming things manually with as many details as you have (eg. You might only know the photo was taken on July 8, 2018, so name it 2018-07-08.jpg, omitting the hour, minute and second)
- Cloud storage often names photos according to this convention automatically (YYYY-MM-DD HH.MM.SS) which is one more reason I like the setup: I can use Renamer when I need to but it’s not a regular occurrence
Duplicates
You will, despite your best efforts, have to deal with duplicate photos. It’s annoying. This is how I deal with them.
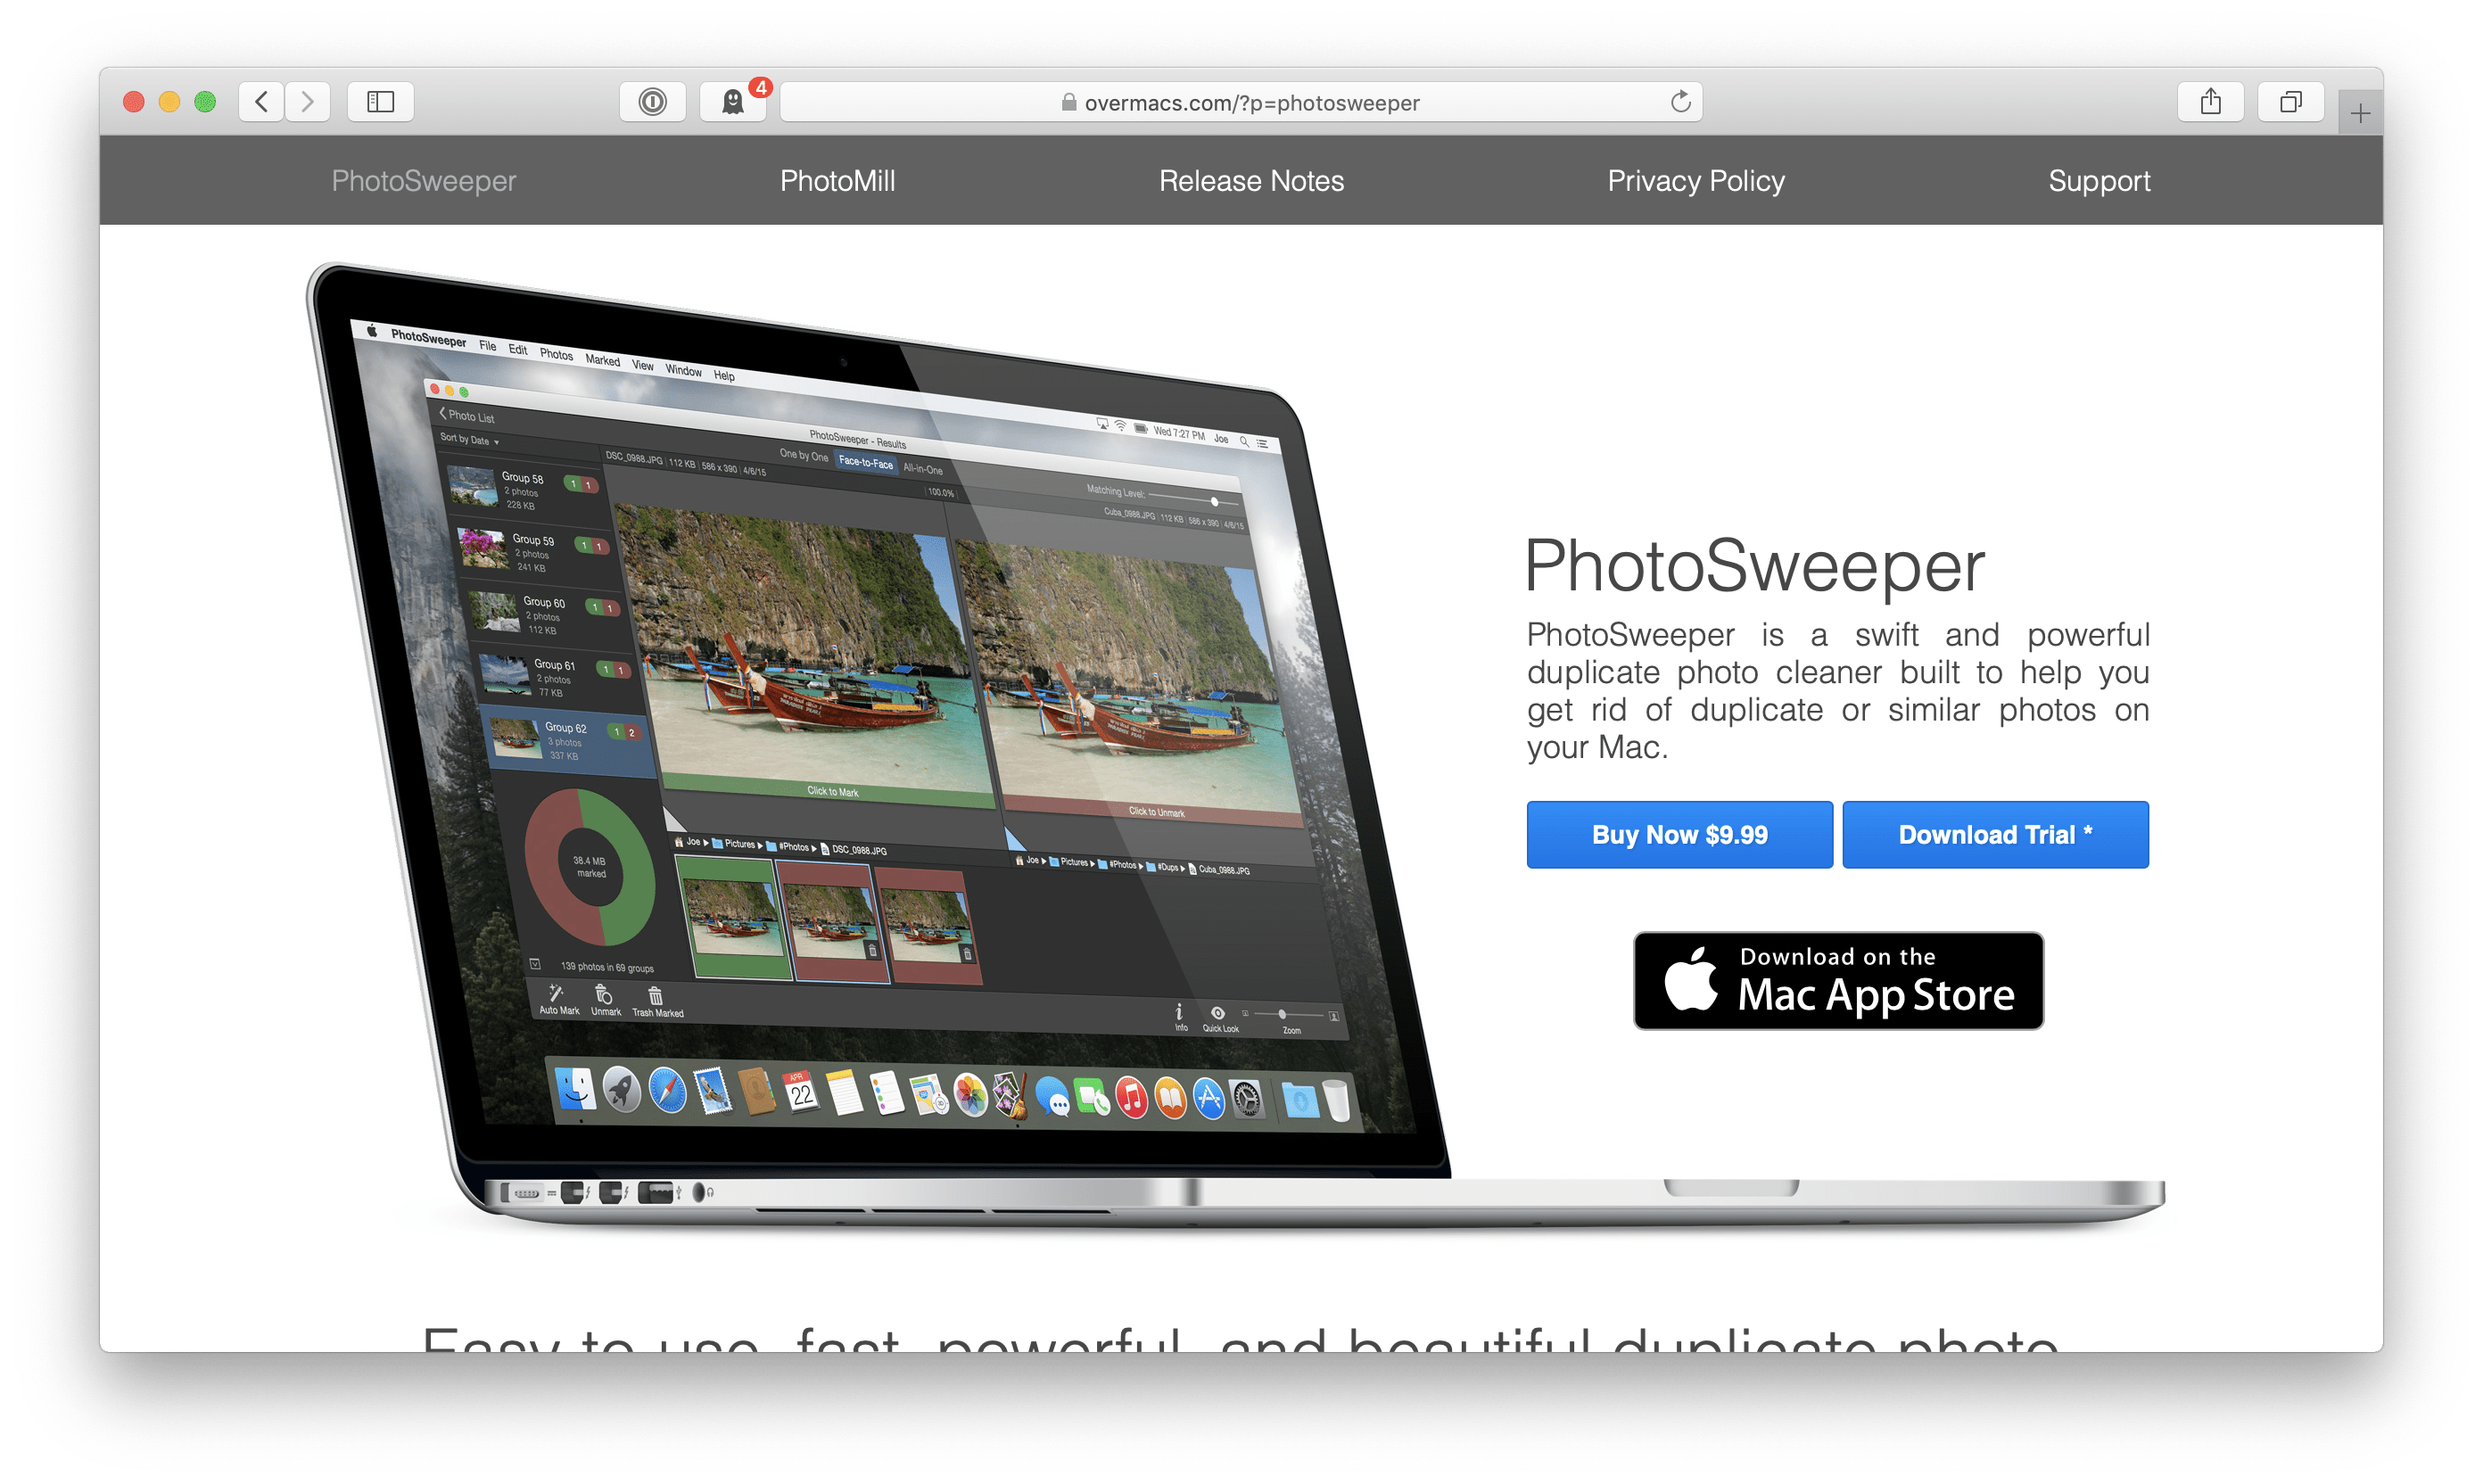
I use PhotoSweeper. With it, you can rapidly analyze an entire directory full of photos and tell PhotoSweeper what constitutes a duplicate (eg. exact and/or approximate image matches). You can rapidly detect the duplicates and settle on the single image you want to keep.
Notes
- PhotoSweeper is a paid app. Again, my opinion: money well spent
- The ability to identify and clean up approximate matches is a great technical feature of PhotoSweeper, because with easy smartphone photography you may end up with lots of similar photos but want to choose to keep only the best one
Tagging
Tagging photos and videos is a great ability to organize your photos along concepts besides the date-based directories I introduced earlier. Here are some ways you could tag and, therefore, filter your images:
- People - photos that include a certain person or people
- Places - photos taken in certain locations
- Albums - other meaningful groupings that transcend the events-based directory grouping may be useful for you
Earlier I introduced the idea of exploiting the Exif metadata to rename your files. But metadata doesn’t end there. There is also IPTC metadata. I won’t dive into the detail of what IPTC can store, but the part that’s important for tagging is called keyword. Keywords in IPTC are essentially tags; they’re comma-separated words that can be used for filtering your photos. You can add as many as you want to any photo and that metadata is saved right in the image file, avoiding dependency on any particular photo management app.
Adobe Bridge
Adobe Bridge offers a great way to manage and view your photos and their metadata. I won’t go into detail on how to use the app itself, but here are some things I really like about how it works:
-
It doesn’t require a database - it’s essentially a viewer of files stored on your computer somewhere. Again, this makes this setup platform independent - Adobe Bridge doesn’t care if you’re using Dropbox, OneDrive or anything else and you can change storage platforms without Bridge knowing or caring
-
Unfortunately Bridge can’t look directly into an online cloud directory; the photos must be synced to your local hard drive or a network drive
-
You have full access (sometimes overwhelmingly so) to the photo metadata. I really only use the
keywordattribute as a tagging system. -
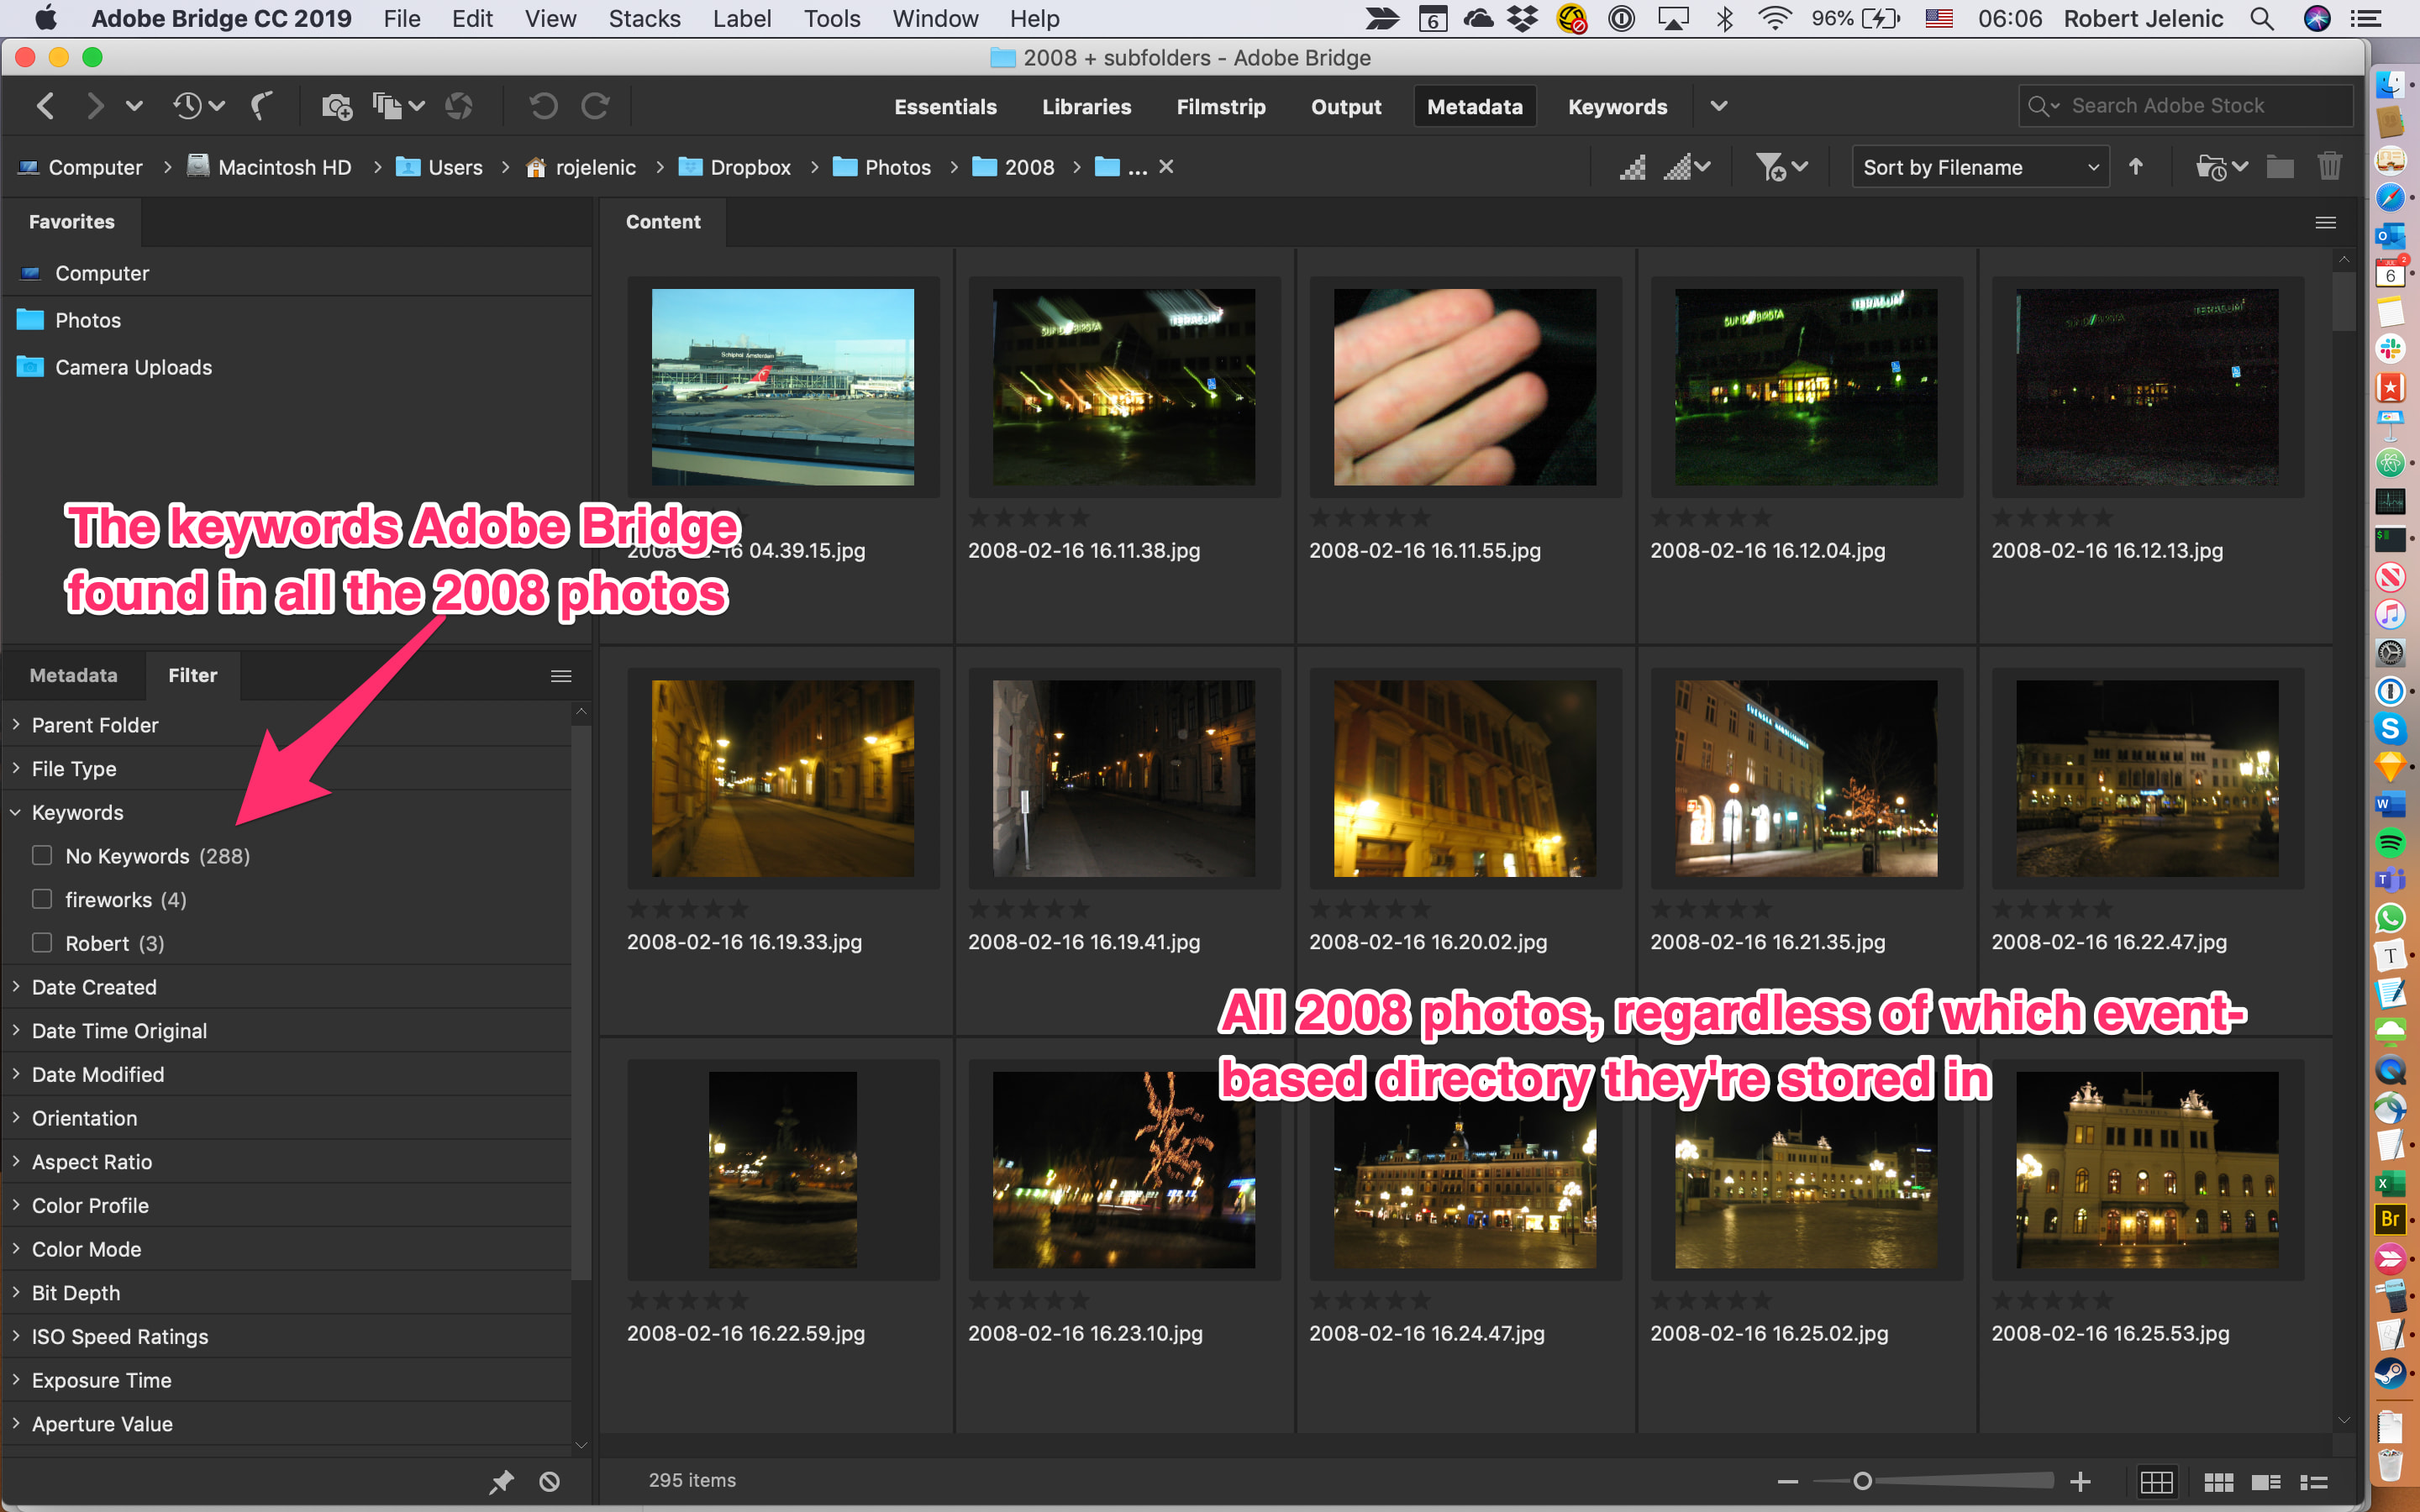
Important: The available metadata is displayed as possible filters. That means that you don’t need to know which keywords exist in a batch of photos because Adobe Bridge scans them all and offers existing Keywords as filter criteria. This filtering feature extends to other metadata like filetype, camera model, a lots more. Avoid any viewer that can’t offer existing (and only existing) metadata as a filter criteria.
-
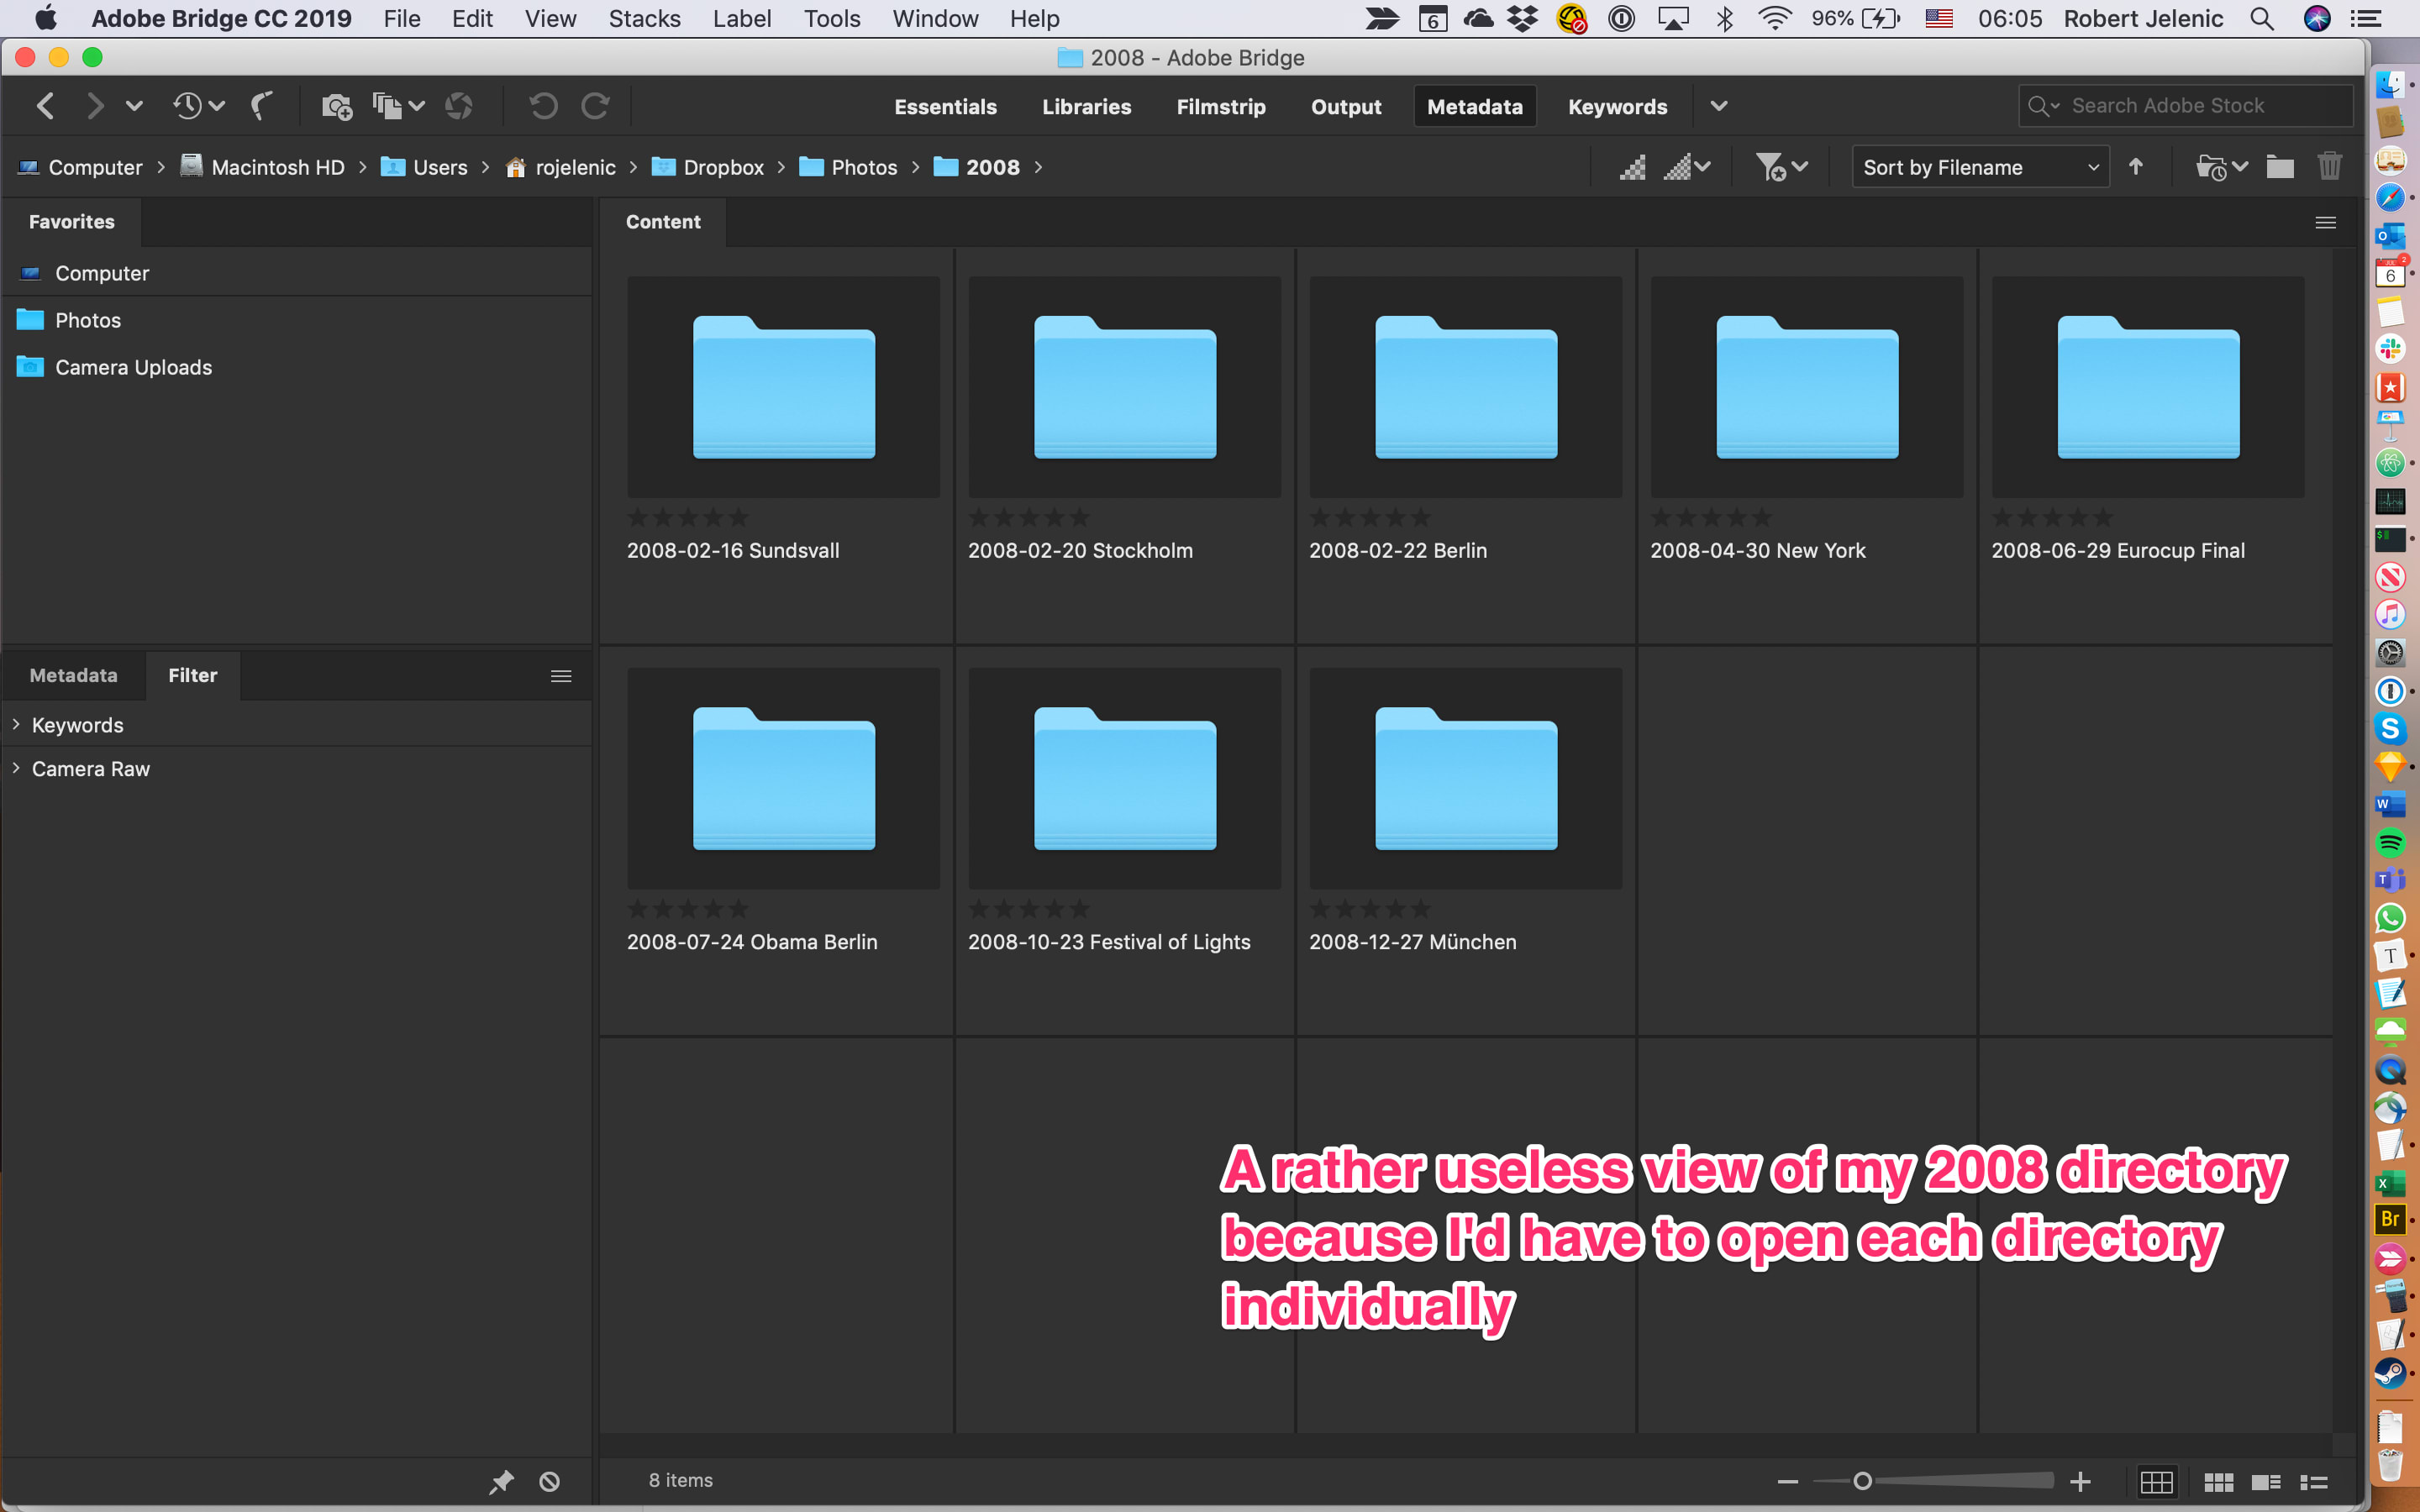
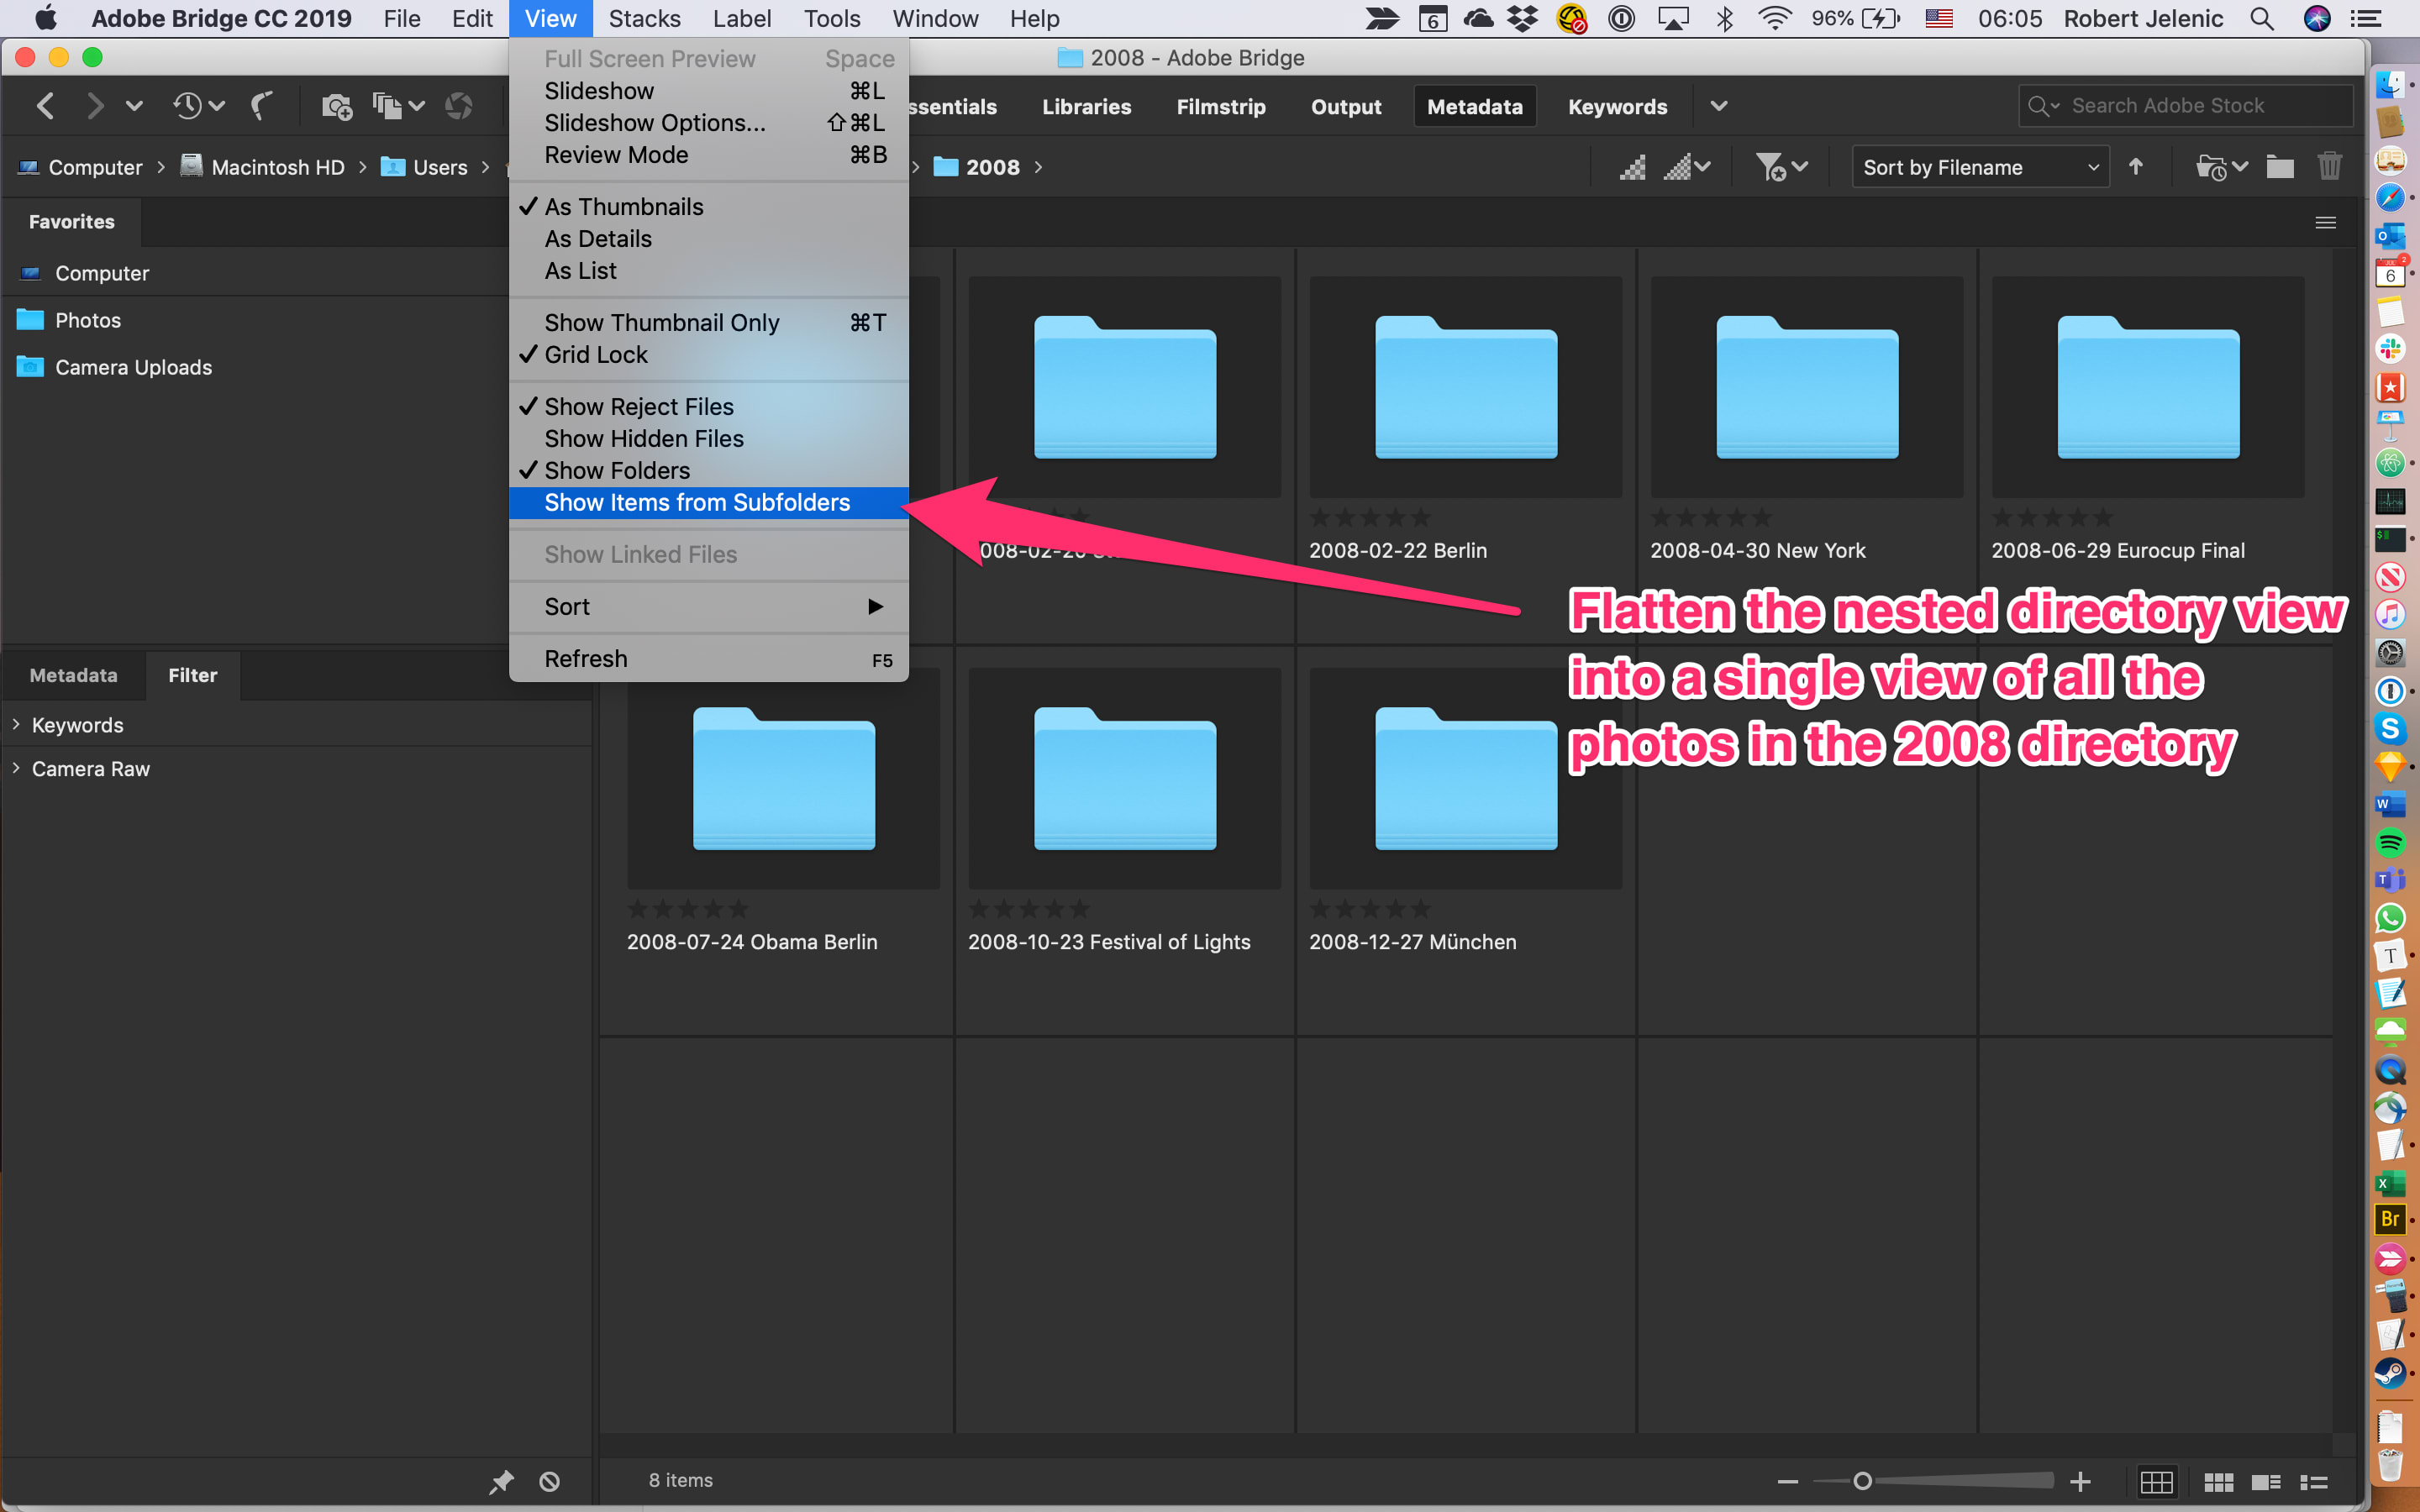
You can elegantly handle the nested directory structure I introduced earlier with its
Show items from subfoldersfeature.
- Adobe Bridge is free, making it a great choice 😉
Closing thoughts
This setup works well for me given my devices and my goals. But there are some places I would love to improve it.
- Although tagging is possible with this setup using IPTC metadata and a nice editor/viewer like Adobe Bridge, the tagging doesn’t happen automatically. If I want to tag images with a person’s name, I have to do it by hand. There’s no fancy facial recognition like Amazon Photos or Apple Photos offer. This is one price I pay for a DIY setup without an underlying database.
- Dropbox’s in-browser view of photos doesn’t support viewing/filtering/editing IPTC metadata and I’m not holding by breath for that after they shut down Carousel. This means that you’ll need to have all the photos you want to view with Adobe Bridge on your physical hard drive or a network drive. I use Dropbox’s Selective Sync, which an increasing number of cloud providers are offering these days, to limit how many photos eat up my hard drive. But ideally I’d offload the storage of the photos to Dropbox and navigate them with the same sophistication Adobe Bridge offers.
Do you have your own thoughts, tips or tricks on how to handle your photos? This topic is a bit of a minefield and I stopped optimizing things when I felt the setup was good enough without being perfect.
